This post is a collaboration with Funky Pigeon.
I've teamed up with the brilliant Funky Pigeon today to bring you some awesome DIY Halloween Crafts - simple and inexpensive ways to spook up your home this Halloween.
Firstly, head over to the Funky Pigeon blog to see their brilliant craft ideas!
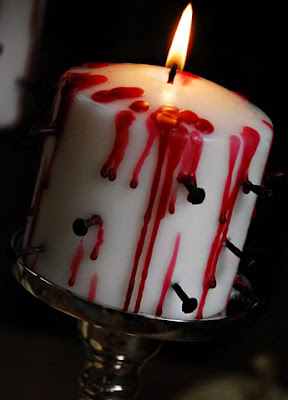
My favourites from their blog post are these frightfully fearsome macabre candles by Camilla Fabbri (see full blog post here)...
And this super fun monster front door (find more monster door ideas here on Pinterest).
EASY & IN-EXPENSIVE DIY HALLOWEEN CRAFTS
You will need:- Black sack
- scissors
- permanent black/gold/silver/white marker
- masking tape
- drinking straw
- battery operated tea light candle
- an old glass bottle (an extra excuse to drink gin!)
- a glue gun
- spray paint or glass paint
BLACK SACK SPIDER WEBS
For this craft you will need:
- black sack
- scissors
- masking tape or washi tape
- permanent marker (black/silver/white/gold)
The easiest of all my craft ideas, these black sack spider webs take minutes to create, and are a super effective, cheap and fast way to decorate your home this Halloween.
This idea came to me when I was lining a round baking tin with baking paper when I last baked a cake - I learnt this method from the fabulous Mary Berry - you fold the baking parchment into a square, then a triangle and cut a rounded end, which when unfolded makes a perfect circle for lining your tin! It also reminded me of making paper snowflakes as a child, and I thought...'I bet you could use this method to make more things', I got my thinking cap on & this idea was born.
Take your black sack (I used a green sack so you could see the markings more easily) and cut off the edges to make it a rectangle shape, once all the edges are cut you should have two rectangles on top of each other (the front and back of the sack, now separated).
Next, fold one corner of your black sack up to the other side - and trim off the excess to make a triangle, which when unfolded makes a perfect square (see first pic).
Fold the triangle in half on the folded side (pic two) and then in half again on the folded side (pic three). Fold in half on folded side one more time to make a skinny triangle with uneven ends (pic four).
Use masking or washi tape to seal up the open side while you cut the detail (pic five).
Next, trim the bottom uneven edge in an inverted curve to make the outside pattern of the spider web (once unfolded). See pic six to show you.
Take a sharpie marker (or gold/silver/white marker if using a black sack) and mark on your pattern, colour in the space which will be cut away, to make the cutting process easier. (see pic seven).
Using scissors begin to cut away your pattern, being careful not to cut up to the taped line (as this would break the web). See pic eight.
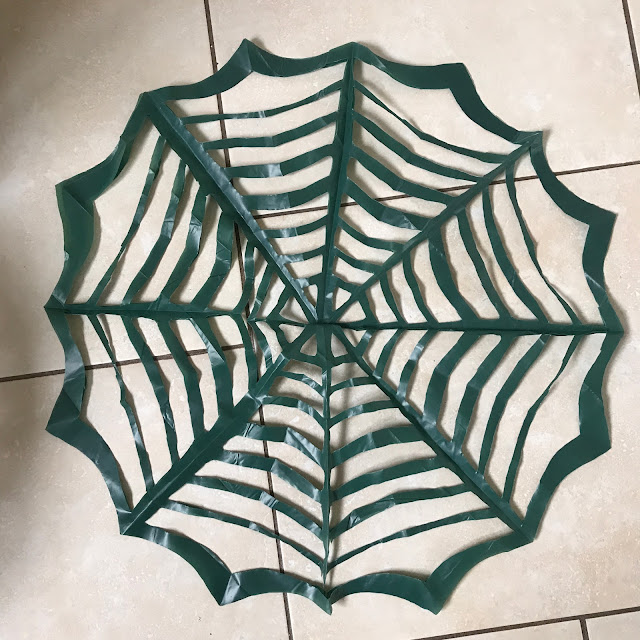
Once all the pattern has been cut away your web should look like pic nine.
Finally, take off the masking tape and careful unfold your web (they are slightly fragile)...
Unfold carefully again to reveal the second web (it should have two layers, so when peeled off you have two brilliant spooktastic webs).
Tah dah! Two big, cheap and super quick webs, perfect for decorating your home this Halloween!
BAT BLOOD BOTTLE
For this craft you will need:
- an empty glass bottle, all labels removed
- an electric craft glue gun
- all purpose spray paint or glass paint in your chosen colour
- a second colour paint for the detail
- a fine paintbrush
For this craft I used an empty gin bottle, which I soaked in warm soapy water to remove the labels. Try to pick interesting shaped bottles for extra effect.
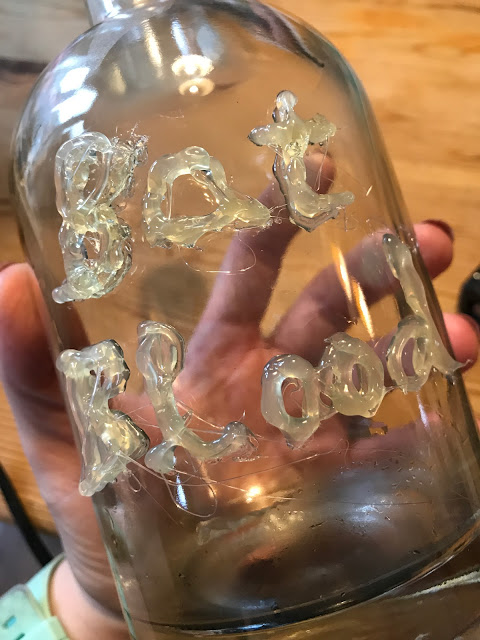
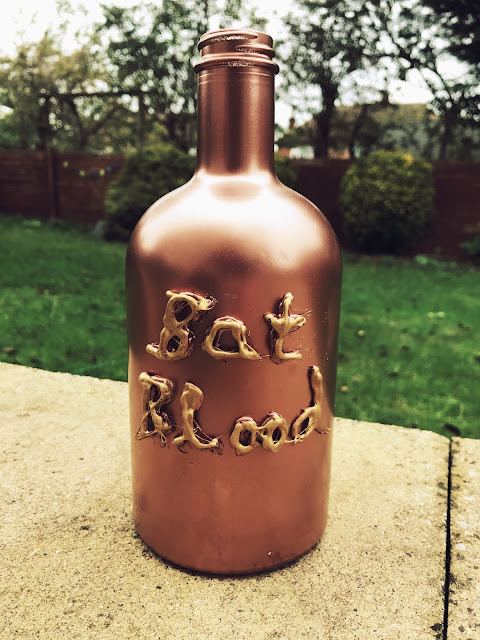
Plug in your glue gun, and once warm, use the glue to draw on your chosen text - I went for 'Bat Blood' but you could choose anything spooky 'poison' 'rats eyes' 'children's fingers' ... whatever you like!
You can build up your letters in layers as the glue should dry hard very quickly. Once you are totally happy with your wording, let it dry totally for a few minutes.
Next, it's time to paint your bottle. I used an all purpose metallic rose gold spray paint, which is a super quick way to get even and fast coverage. If using a spray paint, please use in a well ventilated room, or preferably outside (I did mine in the garden). Alternatively, you can use any paint suitable for glass. Your aim is to totally cover the glass bottle including the writing.
Let the paint dry completely.
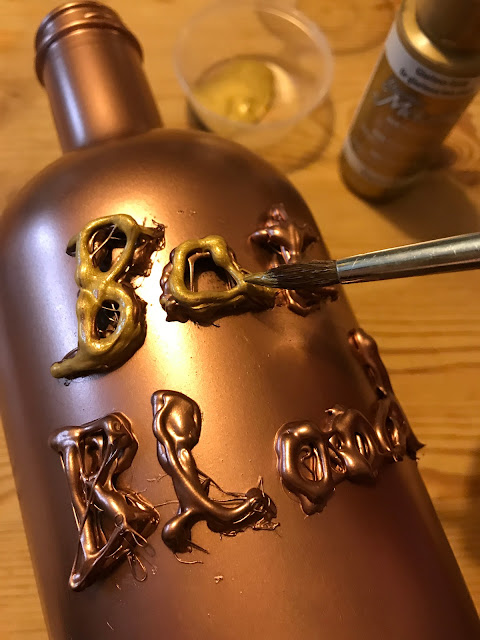
Finally, use a second colour paint (I chose a gold acrylic paint) with a fine paintbrush to go over the words on your bottle, this will help them to stand out and make them look more spooky.
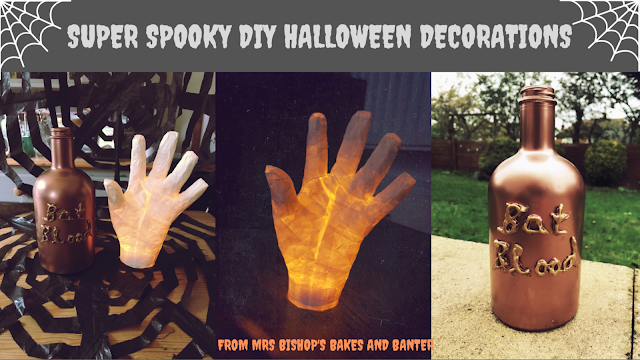
Et voila! Your finished spooky bottle!
MUMMIFIED HAND
You will need:
- a hand model (I used my husband)
- white/cream masking tape
- scissors
- a drinking straw
- a battery operated tea light candle
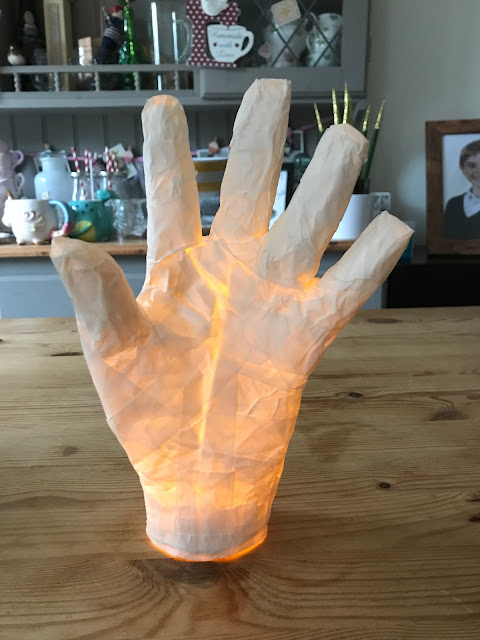
The aim of this craft is to completely cover your hand model's hand in masking tape, to make a free standing hand.
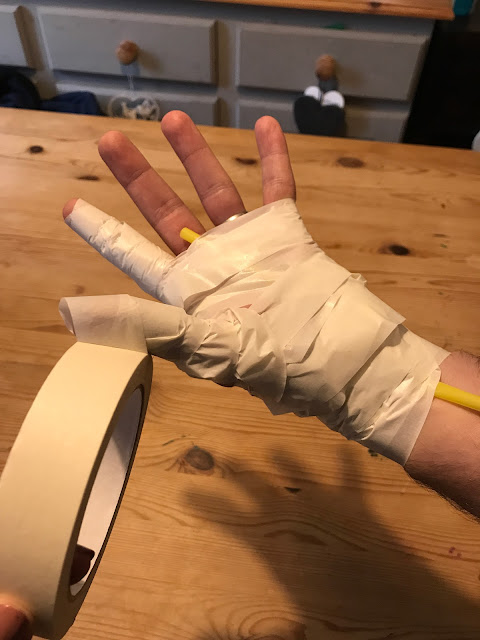
Start the process by laying a plastic drinking straw down the inside of your model's hand and down onto the wrist (this will help you to remove the hand cast later).
Next, begin wrapping your models had in masking tape with the non sticky side down (so it doesn't stick to the models hand, making it impossible to get off at the end). You can wrap very haphazardly at this stage, the key is just getting coverage, and the tape sticking to itself. Ensure a little of the straw pokes out at the bottom on the model's wrist to help you remove the cast later.
Think bandages! Wrap like the tape is a bandage and you can't go wrong! Wrap each individual finger, and cover the joins at the bottom of each finger as best you can. Once the hand is fully covered it is now time to make it sturdier and neater.
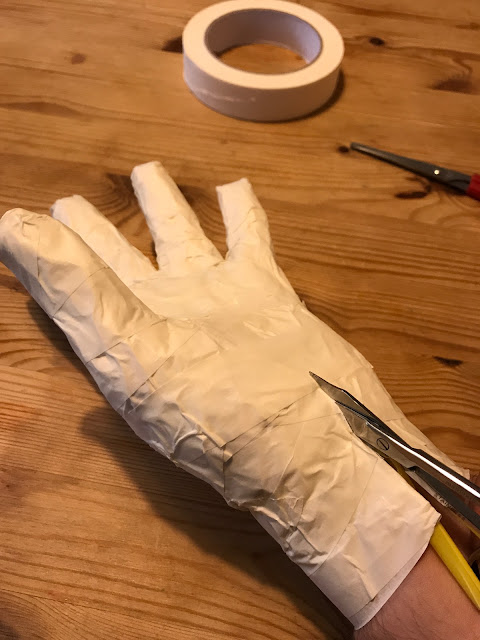
This time you begin the wrapping process again, but with the masking tape sticky side down. This will neaten out the hand, and make it much firmer and sturdier, plus it will ensure a nice non-tacky finish to the hand. Keep on wrapping until you are satisfied that the whole hand is covered and non sticky, and it all seems stuck together.
Next, you need to take your scissors (we found small metal nail scissors to be best) and cut a single line up the length of the plastic straw through the masking tape. You might need to also cut up into the thumb or a finger to be able to remove the cast from the hand, but as little cuts as possible is best. It is probably easier for the model to do the cutting, as they will be able to feel the cast loosening, and wiggle/manipulate their hand out.
Once your model has been able to remove their hand from the masking tape cast it is time to make good the cuts using more strips of masking tape, until all the cuts are covered up, and the hand feels sturdy.
You may need to build up extra bits at the bottom (wrist) of your mummy hand to get it to stand successfully.
Once you can stand your hand up, pop a battery operated tea light candle inside and your freaky mummy hand will come alive. Your hand will be even more effective in a dark room!
I'd love to hear if you have a go at any of these crafts this Halloween!
Before you rush to the pound shop to stock up on plastic decorations, have a think about what you might already have at home that you can use to transform your home into a spooktastic manor!
Happy Crafting!
Mrs B
xxx
^^ Pin to Pinterest ^^


