 |
| Bert aged 1 and 4 - where has my baby gone? |
Today, I want to share with you the recipe for the amazing birthday cake I made for him - I don't always get a chance to bake my kids birthday cakes - with my work schedule the way it is, and a whirlwind of a toddler (Connie) on my hands 24/7, I often struggle to find time for any extras such as cake baking or crafting - but I was determined this year that I'd make Bert a special cake...wanting to spoil him as much as possible before school begins.
I saw the idea for this cake in a video I came across when scrolling my Facebook timeline - good old social media, eh? I did my research, reading tens of recipes and methods - and taking all my preferred bits from each to create this uber cool cake...
Melting Ice Cream Hidden Stripe Funfetti Cake
 |
| ^^ Why not Pin This for later ^^ |
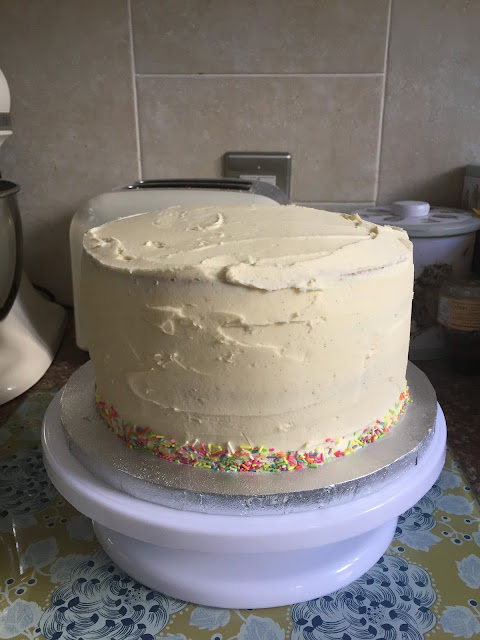
I've sandwiched the layers together with a super indulgent vanilla cream cheese frosting, then crumb coated & covered using vanilla buttercream (which is firmer than the cream cheese frosting and so takes the drip better). I added sprinkles in a border around the bottom of the cake, then left to harden in the fridge.
After a few hours in the fridge to firm up (I left mine overnight) I topped the cake with chocolate Mirror Glaze by Cake Decor to create a drip effect.
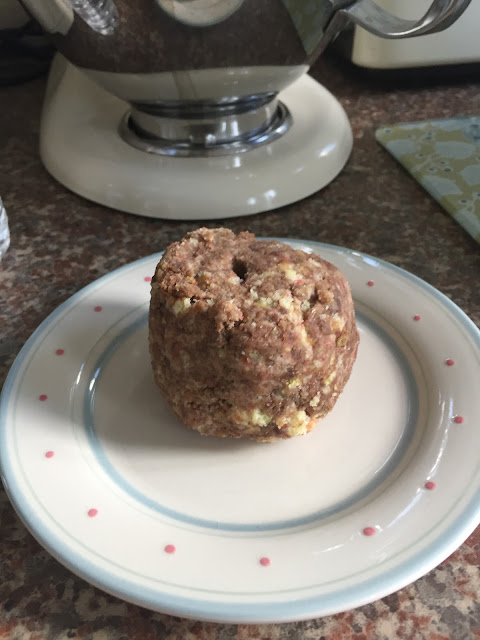
Using the cake shavings from the sponges you create a giant cake pop (cake crumbs & buttercream squished together) to create an ice cream scoop size ball, which you also cover in mirror glaze, and place on the top of the cake using a cake pop stick to attach. The end of the cake pop stick coming out the top is then attached to a waffle cone, which you also fill with cake pop, to give the effect of a melted ice cream atop the cake.
Read below for full ingredients and method...
 |
| Cake porn.. |
INGREDIENTS
For the sponge cakes:
300g caster sugar
450g butter, softened
1 tbsp vanilla bean paste
8 eggs
450g self raising flour
1tsp baking powder
4 tbsp whole milk
200g sprinkles
50g raw cacao powder or cocoa powder (for the chocolate sponges)
For the Cream Cheese Frosting (to sandwich):
150g softened butter
450g icing sugar, sifted
180g tub full-fat cream cheese
1 tbsp vanilla bean paste
For the Buttercream (crumb coat and icing):
280g butter, softened
560g icing sugar
2 tbsp whole milk
1 tbsp vanilla bean paste
Decorations:
1 pot of Cake Decor Mirror Glaze (in desired flavour/colour - I used chocolate)
1 waffle ice cream cone
extra sprinkles for decoration
Equipment:
4 x 20cm/8" cake pans, lined
serrated knife for cutting cakes
Cake board
stand or hand mixer
cake turntable
palette knife
tea spoon
cake pop lolly stick
METHOD
1. Pre heat oven to 160 fan
2. Line 4 cake tins with butter and baking paper.
3. Make the sponge batter: Beat butter and sugar together until light and fluffy (I used my Kitchen Aid Stand Mixer for ease). Next, beat the 8 eggs and then add gradually to the butter/sugar mixture, add a few spoonfuls of flour if the mixture starts to curdle. Add in 1 tbsp of vanilla bean paste, and mix again.
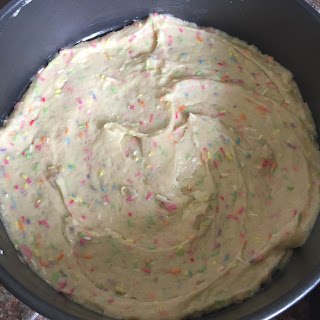
4. Slowly spoon in the flour and baking powder and beat until fully combined. Add 4 tbsp whole milk to loosen the mixture, then add 200g sprinkles and fold in lightly.
5. Halve the mixture. Add 50g cacao or cocoa powder to one half of the sponge mixture to make it chocolatey in flavour.
6. Spoon each half of the mixture into two tins - you should have four cakes in total - two vanilla, and two chocolate.
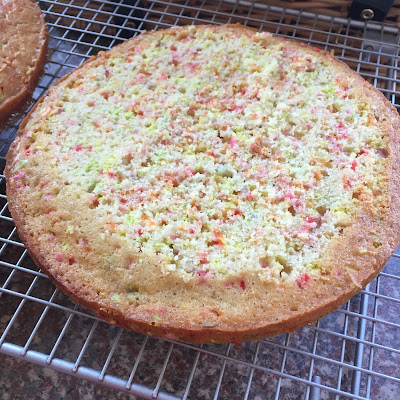
7. Bake for 30 minutes until risen, golden and a skewer comes out clean. I baked all four cakes at the same time, and moved them from top>bottom bottom>top shelf after 15 minutes to ensure an even bake.
8. Leave to fully cool on a wire rack.
9. Make the cream cheese frosting: beat the butter with half of the icing sugar until fully combined and fluffy. Next, add in the cream cheese and the rest of the icing sugar, beating it once again until fully combined. Finally, add the vanilla bean paste and beat until incorporated.
10. Once the cakes are fully cooled - remove from tins and trim each of them using a serrated knife until the tops are flat. Take your time with this and just shave a little off at a time. Save all the cake shavings/crumbs in a bowl (obviously have a little taste, for quality control purposes!).
11. Place your cake board atop the cake turntable if you have one (I really recommend getting one - they're super cheap on Amazon and make cake decorating and icing sooooo much easier!) then blob a little bit of the cream cheese frosting onto your cake board, and place your first sponge onto the cake board, the frosting should help keep it in place.
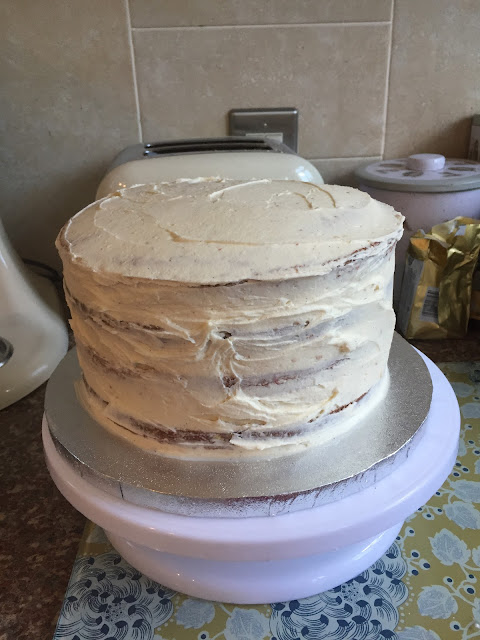
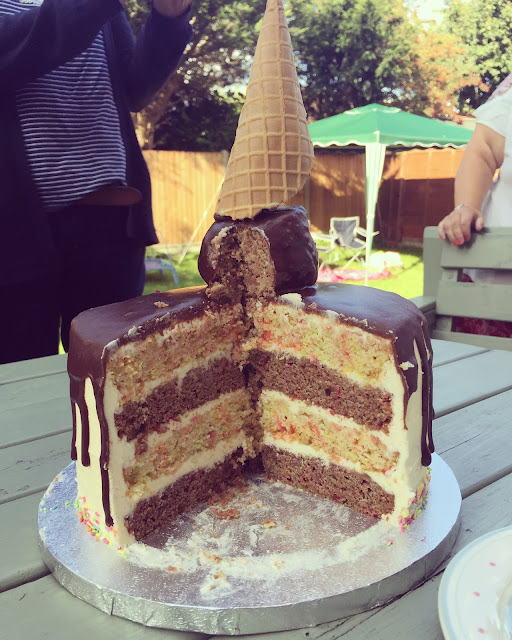
12. Layer on some cream cheese frosting to cover the whole cake, then add the next layer - alternate between vanilla and chocolate layers to get a stripe effect when cut. Layer each cake with more frosting until you have a tall tower of a cake. Place in the fridge to set a little while you make the buttercream.
13. Make the buttercream: Beat the butter in a large bowl until soft. Add half of the icing sugar and beat until smooth. Add the remaining icing sugar, vanilla bean paste and two tablespoons of the milk and beat the mixture until creamy and smooth.
14. Make your cake pops: Add two tablespoons of your buttercream to your cake crumbs, and squidge together to make a round ice cream scoop size ball. It should hold together firmly - if it doesn't just add a little more buttercream.Flatten the bottom slightly so it will sit flush on top of your cake. Add the remaining cake pop mixture into the cavity of the waffle cone, and poke a cake pop lolly stick down into it, then push through your ice cream scoop cake pop - so they all hold together. Make sure an inch or so of the stick comes out the bottom of the ice cream scoop to attach into the cake itself later. Take waffle & stick out of scoop, leaving a hole, as you need to cover the scoop in chocolate drip before it goes on top of the cake later.
15. Crumb coat your cake: Halve what's left of your buttercream mixture and place one half in a bowl in the fridge until you need it. Use the other half to crumb coat your cake. To crumb coat apply a very thin layer of buttercream over the entire cake using a palette knife. This is when the turntable really comes into its own! Place in the fridge to harden for a few hours (minimum half an hour, but the longer you leave it the better the final icing will look).
16. Ice your cake: Now it's time to add your final main layer of buttercream - remove the pre-made buttercream from the fridge and beat again to bring back to life. Using a palette knife, cover the whole cake in a slightly thicker layer of buttercream until you can no longer see any of the sponge cake showing through.
17. Sprinkle the sprinkles all round the bottom edge of the cake and push lightly into the buttercream so they stick, this creates a fun and funky little edge/border and also helps to make the cake look neater. Place cake in the fridge for a few hours to harden (I left mine over night).
18. Final decorations: Take the lid off of your pot of mirror glaze and place in the microwave for 30 seconds, then stir, return to microwave for another 20 seconds and again stir - at this point mine was glossy and runny - pop back in if yours is still a little lumpy. Get cake from fridge and allow mirror glaze to cool slightly (to avoid melting the buttercream) I left mine for about 3 minutes. Place cake back on turntable, and using a tea spoon very slowly spoon the mirror glaze all around the edge of the cake so that it slowly drips down the sides. Once you're happy with all the drips you can spoon more glaze across the top until the whole top of the cake is coated.
19. Place your ice cream scoop cake pop on a plate, and again using a tea spoon use the remaining mirror glaze to completely cover the cake pop. Use a palette knife and your fingers to transfer the cake pop to the top of the cake and carefully touch up any finger marks with mirror glaze.
20. Finally, carefully push the lollipop stick and waffle cone combo into the top of the ice cream scoop until secure. You can add extra sprinkles at this point if required.
21. RELAX and enjoy scoffing your masterpiece.
22. Get someone else to clear up.
Watch this super satisfying time-lapse video of me adding the mirror glaze drip to my cake...
And here's the final cake...
 |
| T'ah D'ah! Melting chocolate ice cream hidden stripe funfetti cake. |
I was so chuffed with the final cake, and more importantly so was Bert! A real show-stopper I think you'll agree.
Here's a few photos of the inside of the cake too...isn't it pretty and effective?
What have you been baking recently?
Mrs B
xxx
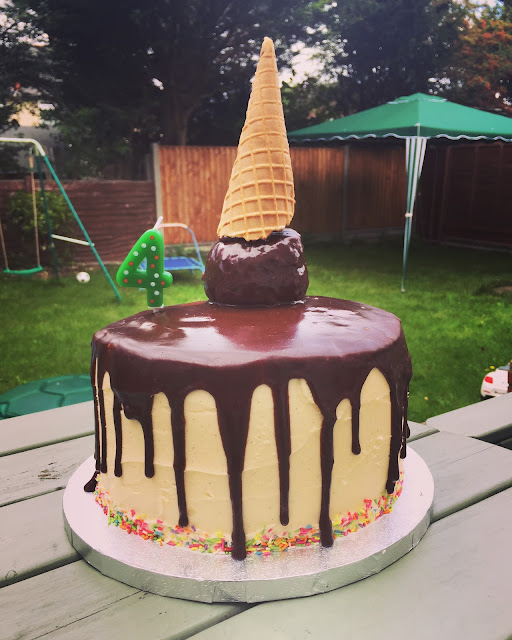 |
| All ready for singing "Happy Birthday" and blowing out the candles... |
What have you been baking recently?
Mrs B
xxx

