Friday 25 October 2019

Disney On Ice: 100 Years of Magic #AD #Review #Gifted

Last weekend we headed to Birmingham Arena to see Disney on Ice - 100 Years of Magic, it was our third visit to a Disney on Ice show (Bert and I) but it was Liam and Connie's first experience. I was so excited to experience the show with them for the first time.

Beforehand, Connie was most excited about seeing her beloved Minnie Mouse, Anna from Frozen, Belle from Beauty and the Beast, and Rapunzel from Tangled - thankfully, they didn't disappoint and she got to experience all her favourite Disney characters live on the ice. 

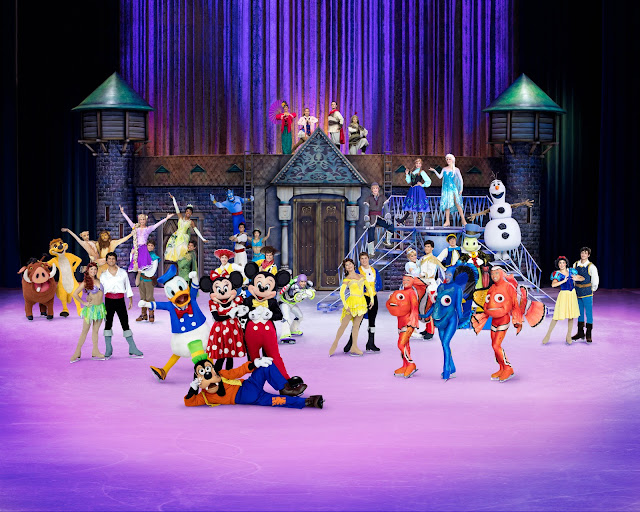
This fanfare production featured more than 50 unforgettable Disney stars in a celebration of 100 years of Walt Disney magic. 
Disney on Ice - 100 Years of Magic 2019
The show had us travel to the heart of Africa with Disney’s The Lion King, we were taken on an adventure in friendship with the gang from Disney Pixar’s Toy Story, and we watched in amazement as Belle broke the Beast’s curse in the tale of Beauty & The Beast. To Connie's delights we got to enter the magical kingdom of Arendelle from Disney’s Frozen and journey up the North Mountain with hilarious snowman Olaf and rugged mountain-man Kristoff, as they helped royal sisters Anna and Elsa discover that true love conquers all.
Disney on Ice - 100 Years of Magic 2019 - The Little Mermaid
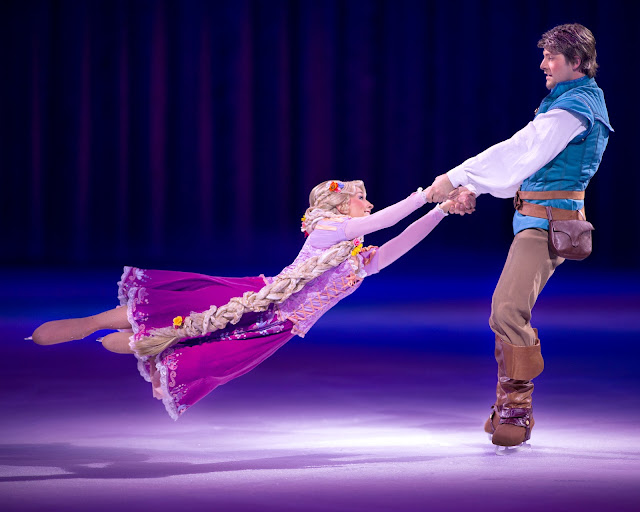
Disney on Ice - 100 Years of Magic 2019 - Tangled
Disney on Ice - 100 Years of Magic 2019 - Snow White
Disney on Ice - 100 Years of Magic 2019 - Aladdin and Princess Jasmine
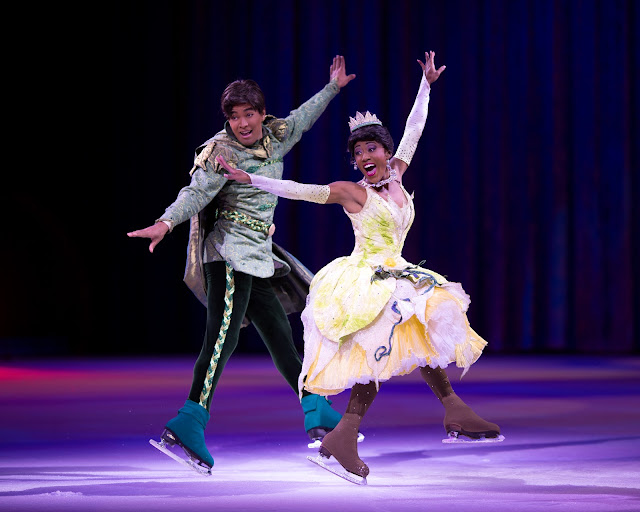
Disney on Ice - 100 Years of Magic 2019 - The Princess and The Frog
Out of all the Disney on Ice shows we've seen to date, this one incorporated a larger number of Disney classics/characters, the first part of the show focussing very much on all the famous Prince/Princess couples through the years - although this was very beautiful to watch, it was less of a visual spectacle than other Disney on Ice shows we've seen - there was a lot less set/large props etc - it was very much about the ice dancers (who are extraordinarily talented!) It could be because Connie is only 3, but towards the end of the first section her concentration was waning & she was becoming a little restless. 

This picked up once we got into a larger-scale sequence of the Frozen story - and she had a lot more to look at - with amazing costumes, set, lighting and even pyrotechnics. This large-scale spectacle stuff is definitely what Disney on Ice do best! 
Disney on Ice - 100 Years of Magic 2019 -  Frozen
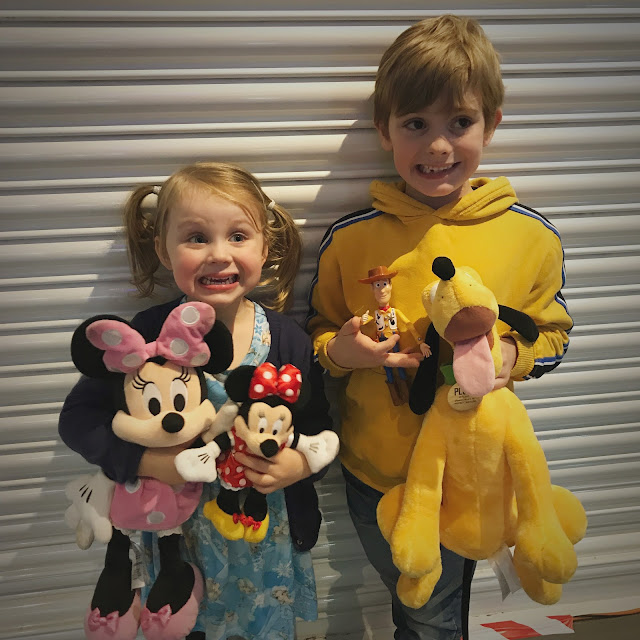
During the interval we refuelled and the kids chose a little toy each, I will say that as expected with big arena tours like this, the merchandise is expensive - so be prepared - if it's in your budget then great, but if not perhaps encouraging the kids to save some pocket money or birthday/xmas money to spend would be wise, or to bring along their own Disney toys (mine both bought their own Minnie Mouse and Pluto cuddly toys), but they had also been given £15 each from their Nanny to spend at the show, so Connie chose a small cuddly toy Minnie Mouse ("a baby Minnie!") and Bert chose a small Woody figure which were both priced at just under £15 - there wasn't really much at all for under £12 - and the big cuddly toys were around £22. My two were of course THRILLED with their new purchases and haven't put them down a week later!
Disney on Ice - 100 Years of Magic 2019 - Bert and Connie with their toys
One thing I will say, is Bert and I have been lucky enough to be gifted tickets to see three consecutive Disney on Ice shows, and I think for Bert this time (without wanting him to come across as spoilt or conceited) the show's content was quite samey/similar to previous shows we've seen (in terms of which stories were told) but the style was different (not so much of the longer stories so much as a celebration of lots and lots of characters).

The last two Disney on Ice shows we saw were Disney on Ice: Dream Big in Nov 2018 and Disney on Ice: Worlds of Enchantment in April 2018, which definitely focussed more on telling the famous stories we know and love, rather than spanning as many characters as possible. Of course, there are only so many Disney characters in existence, so you have to expect a certain level of repetition at these style shows, but perhaps three shows in quick succession means he has been very spoilt! 

He did struggle to focus - getting a bit twitchy throughout - he found the 'just dancing' (his words) sequences a bit long, and I think he was looking for the big-scale sets, pyrotechnics in abundance and some more of the longer story sequences which we've experienced at previous shows. He got a stern talking to afterwards about how lucky he is, and how some children never get to see a Disney on Ice show, and he's seen three!! But you know six year olds - they say exactly what they think, damn the consequences or how it might sound to others! 
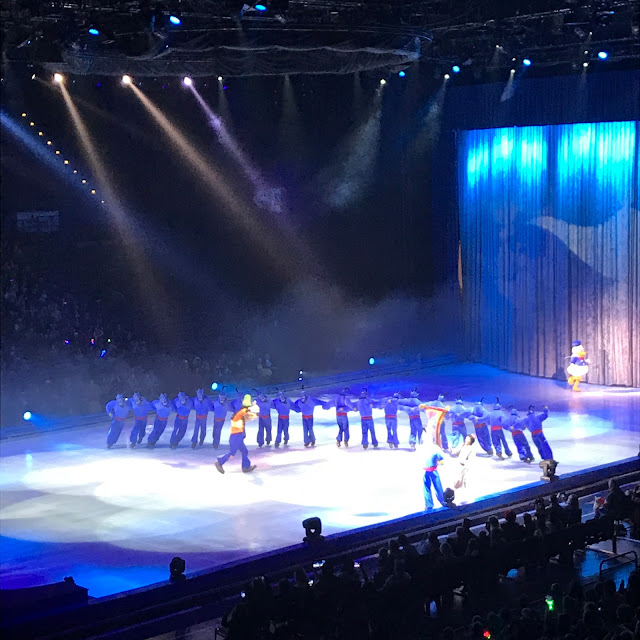
Disney on Ice - 100 Years of Magic 2019 - Aladdin
That being said, Bert's favourite part by far was the short Aladdin sequence (his favourite of the Disney classics) and he especially loved the appearance of all the genies!! What fun! 
Disney on Ice - 100 Years of Magic 2019 - Aladdin
For me, the best part was watching Connie's reaction to seeing it all for the first time, I loved watching her wave away at Minnie Mouse and squeal with excitement when she realised Belle was on the ice - priceless moments indeed. She wore her Frozen dress and she was so excited to be wearing it to the special Disney show - bless her heart! 
Connie at Disney on Ice - 100 Years of Magic 2019
Disney on Ice - 100 Years of Magic 2019 - Mulan
My favourite part of the show was the Mulan sequence - especially the giant Chinese dragon, it was amazing! I absolutely LOVE Mulan (I'm SO EXCITED for the live action version coming out soon!) and because it's not as popular a Disney film, you don't often see it included in shows like this, so I was thrilled to see it had a part to play in this version of the show. They sang 'Let's Get Down to Business' which is one of my favourite songs from Mulan, and I just thoroughly enjoyed the whole sequence - my only complaint was I wish they'd told more of the story and given more stage time to it.
Disney on Ice - 100 Years of Magic 2019 - Mulan
 Despite the reservations about the content this time round, Disney on Ice in our opinion is still a very special experience, perfect for families who love all things Disney. The quality of the production as a whole is really brilliant - from the amazing ice dancers, to the costumes, the enchanting music we all know and love (and sing along to) the set design to the incredible lighting, it is a wonder to behold. There's just something about an arena full of happy Disney fans all enjoying the Disney magic across many generations that can't fail at putting a smile on your face. 

We will most definitely be back! 

Huge thanks to the Disney on Ice team for having us! 

--------------------------------------------------------------------------------------------------------

Book your tickets now to avoid disappointment at www.disneyonice.com

Stay current on the latest developments through social media by visiting:

Twitter: @DisneyOnIce #DisneyOnIce #100YearsofMagic
Instagram: @DisneyOnIce

We were given complimentary tickets to Disney on Ice in return for this review post. All views are our own.

Monday 14 October 2019

DIY Halloween Crafts (Ad)

#AD #sponsored 
This post is a collaboration with Funky Pigeon. 
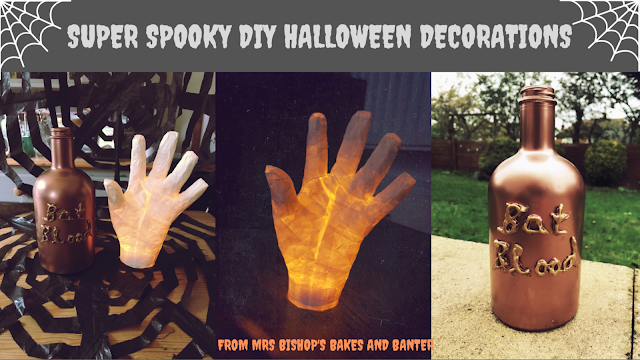
DIY Halloween crafts from Mrs Bishop's Bakes and Banter blog
I've teamed up with the brilliant Funky Pigeon today to bring you some awesome DIY Halloween Crafts - simple and inexpensive ways to spook up your home this Halloween.

Firstly, head over to the Funky Pigeon blog to see their brilliant craft ideas!

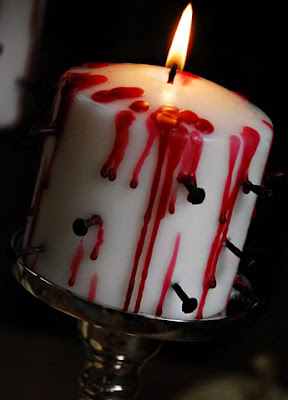
My favourites from their blog post are these frightfully fearsome macabre candles by Camilla Fabbri (see full blog post here)...

macabre candles diy halloween craft
And this super fun monster front door (find more monster door ideas here on Pinterest).
monster front door diy halloween crafts
EASY & IN-EXPENSIVE DIY HALLOWEEN CRAFTS
DIY Halloween crafts from Mrs Bishop's Bakes and Banter blog
You will need:
  • Black sack
  • scissors
  • permanent black/gold/silver/white marker 
  • masking tape
  • drinking straw
  • battery operated tea light candle
  • an old glass bottle (an extra excuse to drink gin!)
  • a glue gun
  • spray paint or glass paint 
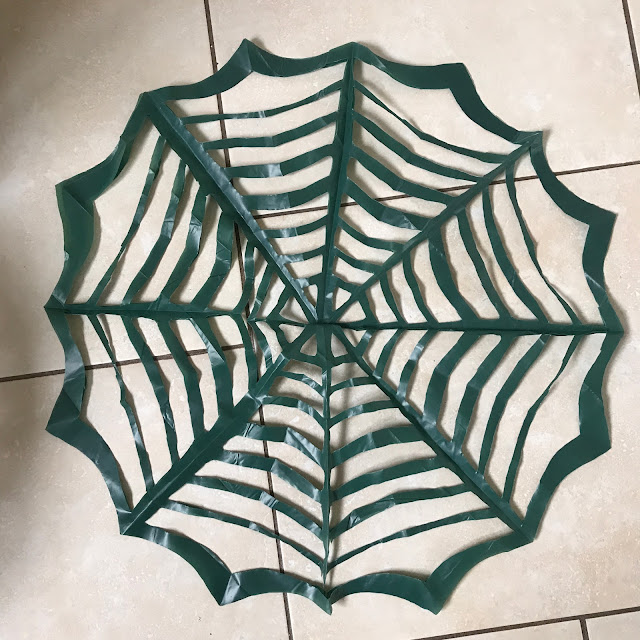
BLACK SACK SPIDER WEBS
For this craft you will need:
  • black sack
  • scissors
  • masking tape or washi tape
  • permanent marker (black/silver/white/gold)
The easiest of all my craft ideas, these black sack spider webs take minutes to create, and are a super effective, cheap and fast way to decorate your home this Halloween. 

This idea came to me when I was lining a round baking tin with baking paper when I last baked a cake - I learnt this method from the fabulous Mary Berry - you fold the baking parchment into a square, then a triangle and cut a rounded end, which when unfolded makes a perfect circle for lining your tin! It also reminded me of making paper snowflakes as a child, and I thought...'I bet you could use this method to make more things', I got my thinking cap on & this idea was born.  

Take your black sack (I used a green sack so you could see the markings more easily) and cut off the edges to make it a rectangle shape, once all the edges are cut you should have two rectangles on top of each other (the front and back of the sack, now separated).

Next, fold one corner of your black sack up to the other side - and trim off the excess to make a triangle, which when unfolded makes a perfect square (see first pic).

Fold the triangle in half on the folded side (pic two) and then in half again on the folded side (pic three). Fold in half on folded side one more time to make a skinny triangle with uneven ends (pic four).

Use masking or washi tape to seal up the open side while you cut the detail (pic five). 

Next, trim the bottom uneven edge in an inverted curve to make the outside pattern of the spider web (once unfolded). See pic six to show you. 

Take a sharpie marker (or gold/silver/white marker if using a black sack) and mark on your pattern, colour in the space which will be cut away, to make the cutting process easier. (see pic seven).

Using scissors begin to cut away your pattern, being careful not to cut up to the taped line (as this would break the web). See pic eight. 

Once all the pattern has been cut away your web should look like pic nine. 

Finally, take off the masking tape and careful unfold your web (they are slightly fragile)...
black sack spider webs DIY Halloween Crafts
Unfold carefully again to reveal the second web (it should have two layers, so when peeled off you have two brilliant spooktastic webs). 
black sack spider webs DIY Halloween Crafts
Tah dah! Two big, cheap and super quick webs, perfect for decorating your home this Halloween! 

BAT BLOOD BOTTLE
For this craft you will need:
  • an empty glass bottle, all labels removed
  • an electric craft glue gun
  • all purpose spray paint or glass paint in your chosen colour
  • a second colour paint for the detail
  • a fine paintbrush
For this craft I used an empty gin bottle, which I soaked in warm soapy water to remove the labels. Try to pick interesting shaped bottles for extra effect. 
step by step spooky bottle 'Bats Blood' DIY Halloween crafts
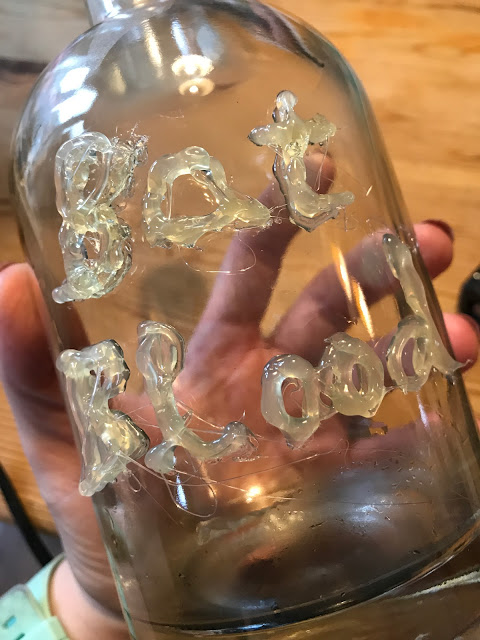
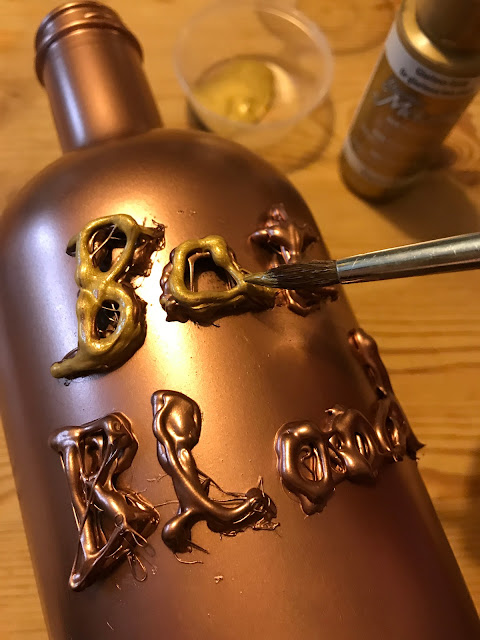
Plug in your glue gun, and once warm, use the glue to draw on your chosen text - I went for 'Bat Blood' but you could choose anything spooky 'poison' 'rats eyes' 'children's fingers' ... whatever you like! 
step by step spooky bottle 'Bats Blood' DIY Halloween crafts

step by step spooky bottle 'Bats Blood' DIY Halloween crafts

step by step spooky bottle 'Bats Blood' DIY Halloween crafts
You can build up your letters in layers as the glue should dry hard very quickly. Once you are totally happy with your wording, let it dry totally for a few minutes. 

Next, it's time to paint your bottle. I used an all purpose metallic rose gold spray paint, which is a super quick way to get even and fast coverage. If using a spray paint, please use in a well ventilated room, or preferably outside (I did mine in the garden). Alternatively, you can use any paint suitable for glass. Your aim is to totally cover the glass bottle including the writing. 
step by step spooky bottle 'Bats Blood' DIY Halloween crafts
Let the paint dry completely. 

Finally, use a second colour paint (I chose a gold acrylic paint) with a fine paintbrush to go over the words on your bottle, this will help them to stand out and make them look more spooky. 
step by step spooky bottle 'Bats Blood' DIY Halloween crafts
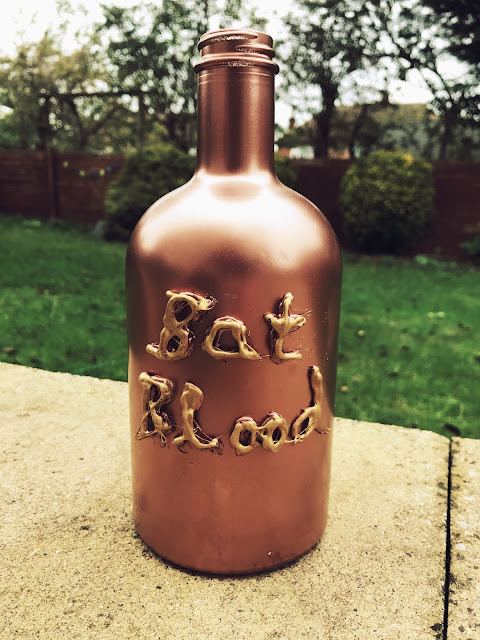
Et voila! Your finished spooky bottle! 
Spooky bottle 'Bats Blood' DIY Halloween crafts
MUMMIFIED HAND
You will need:
  • a hand model (I used my husband)
  • white/cream masking tape
  • scissors 
  • a drinking straw
  • a battery operated tea light candle
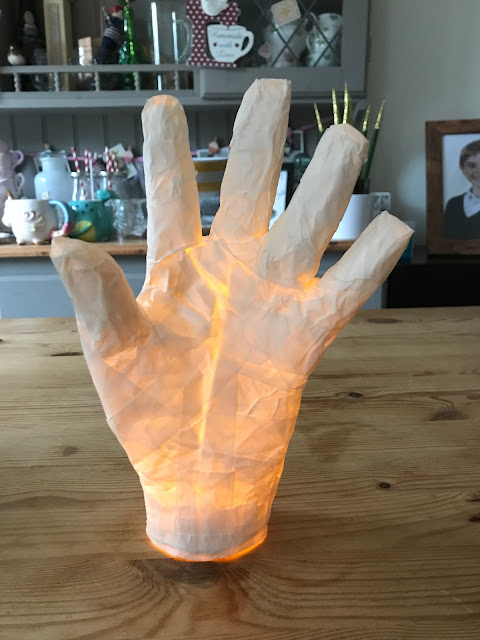
The aim of this craft is to completely cover your hand model's hand in masking tape, to make a free standing hand. 

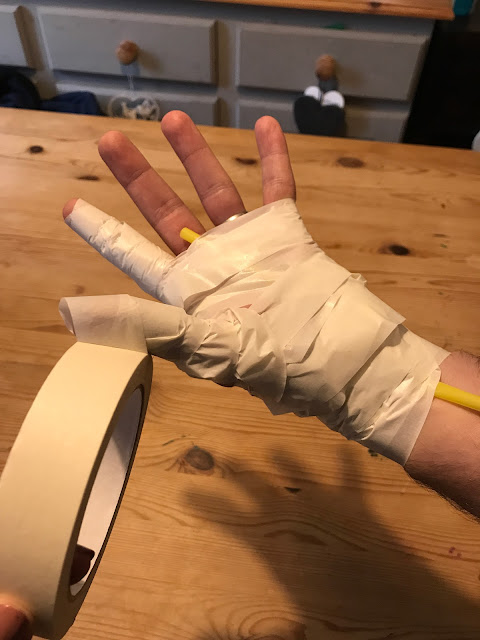
Start the process by laying a plastic drinking straw down the inside of your model's hand and down onto the wrist (this will help you to remove the hand cast later). 

Next, begin wrapping your models had in masking tape with the non sticky side down (so it doesn't stick to the models hand, making it impossible to get off at the end). You can wrap very haphazardly at this stage, the key is just getting coverage, and the tape sticking to itself. Ensure a little of the straw pokes out at the bottom on the model's wrist to help you remove the cast later. 
step by step masking tape mummy hand DIY Halloween crafts
Think bandages! Wrap like the tape is a bandage and you can't go wrong! Wrap each individual finger, and cover the joins at the bottom of each finger as best you can. Once the hand is fully covered it is now time to make it sturdier and neater. 

This time you begin the wrapping process again, but with the masking tape sticky side down. This will neaten out the hand, and make it much firmer and sturdier, plus it will ensure a nice non-tacky finish to the hand. Keep on wrapping until you are satisfied that the whole hand is covered and non sticky, and it all seems stuck together. 
step by step masking tape mummy hand DIY Halloween crafts
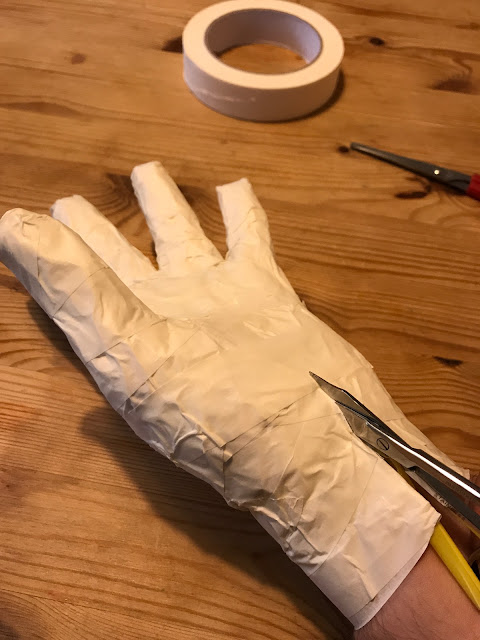
Next, you need to take your scissors (we found small metal nail scissors to be best) and cut a single line up the length of the plastic straw through the masking tape. You might need to also cut up into the thumb or a finger to be able to remove the cast from the hand, but as little cuts as possible is best. It is probably easier for the model to do the cutting, as they will be able to feel the cast loosening, and wiggle/manipulate their hand out. 
step by step masking tape mummy hand DIY Halloween crafts

step by step masking tape mummy hand DIY Halloween crafts
Once your model has been able to remove their hand from the masking tape cast it is time to make good the cuts using more strips of masking tape, until all the cuts are covered up, and the hand feels sturdy. 
step by step masking tape mummy hand DIY Halloween crafts
You may need to build up extra bits at the bottom (wrist) of your mummy hand to get it to stand successfully. 
step by step masking tape mummy hand DIY Halloween crafts
Once you can stand your hand up, pop a battery operated tea light candle inside and your freaky mummy hand will come alive. Your hand will be even more effective in a dark room!
masking tape mummy hand DIY Halloween crafts

masking tape mummy hand DIY Halloween crafts
I'd love to hear if you have a go at any of these crafts this Halloween! 

Before you rush to the pound shop to stock up on plastic decorations, have a think about what you might already have at home that you can use to transform your home into a spooktastic manor!
DIY Halloween crafts from Mrs Bishop's Bakes and Banter blog
Happy Crafting!

Mrs B

xxx


Why not save for later on Pinterest?
DIY Halloween crafts from Mrs Bishop's Bakes and Banter blog
^^ Pin to Pinterest ^^

Thursday 26 September 2019

AD | REVIEW 360 Play Milton Keynes Character Breakfast + GIVEAWAY

#AD #REVIEW #GIFTED

On Saturday we ventured down the road to Milton Keynes to attend a special Character Breakfast at 360 Play.


360 Play logo


360 Play Milton Keynes Character Breakfast

360 Play is an amazing brand of soft play centres filled to bursting with brilliant play facilities for children of all ages. They currently have centres in Basildon, Farnborough, Leicester, Milton Keynes, Redditch, Rushden Lakes and Stevenage. 

The play facilities at our local 360 Play (Milton Keynes) includes a huge soft play frame, musical carousel, a toddler zone for under 4s, 360 Street (a creative play/toddler village zone), dodgems, messy play area and even an outdoor play area which includes climbing, paddle boats, a huge sandpit and outdoor seating area. They also have a brilliant cafe so adults can grab a drink/food/snacks while the kids play - perfect! 

We were kindly invited along to review their Character Breakfast event - where you're treated to a buffet breakfast, meeting some brilliant characters plus a long play session for the kids! 

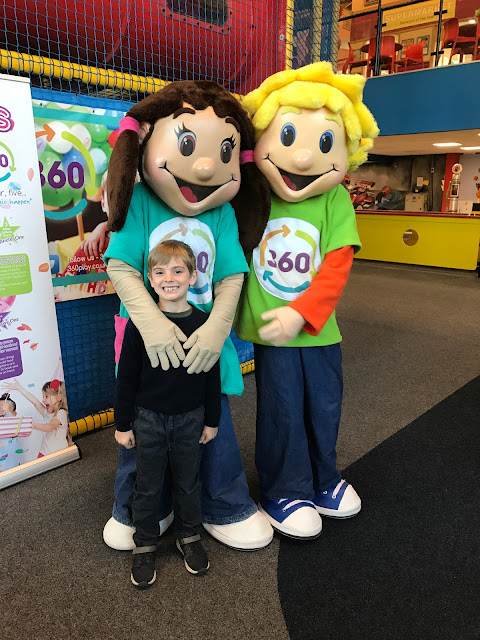
We arrived at 9am and were greeted by the lovely staff and the two 360 Play mascots called Twizzle and Twirl. Both Bert and Connie were so excited to meet the characters, and they loved eating breakfast among the super friendly and fun mascots. 
Twizzle and Twirl at 360 Play Milton Keynes
We were greeted by Twizzle and Twirl 
Our table was laid nicely - all ready for our breakfast! 
Our table was laid out all ready for us, and after just a few minutes the breakfast buffet was open for us all to help ourselves. There were about six or seven other families at the Character Breakfast, so we didn't have to queue for vey long at all to get our food. 

We could choose from:

- Tea, Coffee, Juice or Water
- Breakfast cereal & milk
- Sausage in a roll
- Bacon in a roll
- Croissants with butter and jams/marmalade 
- Toast with butter and jams/marmalade
- Pain au Chocolat 


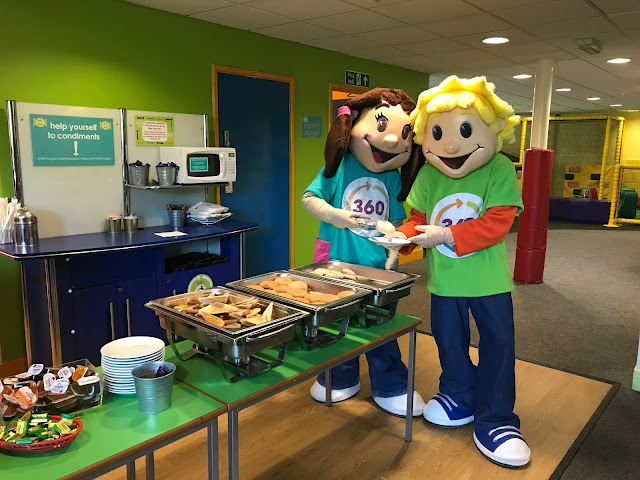
The food was delicious and there was plenty of it - allowing anyone to go back for seconds, or even thirds! The kids ate loads, and were thrilled when Twizzle and Twirl served them their breakfast rolls. 
Character breakfast at 360 Play
Twizzle and Twirl served us our breakfast! 
A very happy Bertster with ALL THE PASTRY! 
Double thumbs up from Connie! 
A sausage patty soft roll and a croissant for moi! 
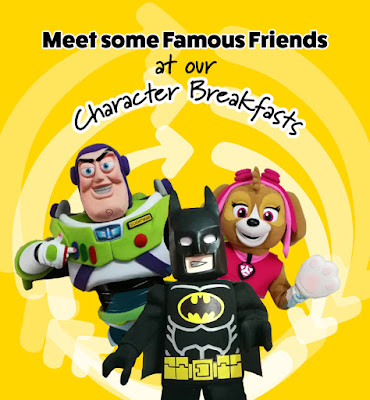
Just after we had eaten we were joined by two more amazing characters - Skye from Paw Patrol and Lego Batman!! There was plenty of time for the kids to pose for photos with the characters, which they loved. It just added a really extra-special edge to the breakfast and added even more incentive to take the kids along to a soft play session.
Happy kids! (and colour co-ordinated with their fave characters it seems!)
Lego Batman and Bert
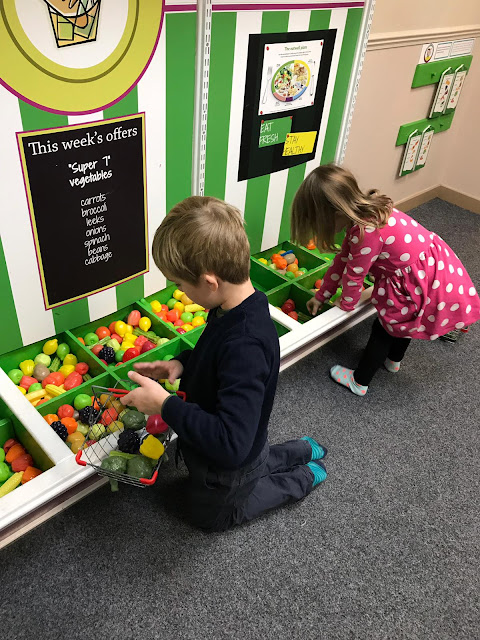
Then ensued a mammoth play session where-in I lost Liam and the kids for about 1.5 hours! Unfortunately, I have a really bad back at the moment and couldn't join them on the soft play frame, but it was clear to see they had tons of fun - and naturally didn't want to go home when the time came. 
360 Play Milton Keynes Review
Connie's face in this one makes me laugh so hard! Action shot!  
360 Play Milton Keynes Review

360 Play Milton Keynes Review

360 Play Milton Keynes Review

360 Play Milton Keynes Review

360 Play Milton Keynes Review

360 Play Milton Keynes Review

360 Play Milton Keynes Review

360 Play Milton Keynes Review

360 Play Milton Keynes Review

360 Play Milton Keynes Review

360 Play Milton Keynes Review

360 Play Milton Keynes Review
As you can see from the pictures, there really is so much fun to be had at 360 Play - we found the whole place to be clean and the equipment all in good condition, the staff were friendly and you really couldn't fault the range of facilities and play equipment at all. 

We would really recommend going along to 360 Play for a Character Breakfast, if you're interested you can find out dates and book tickets on the 360 Play website. 

Ticket prices for the Character Breakfast are as follows:

Children £12.95 
Adults £6.95

Price includes the buffet breakfast in an exclusive area and early entrance to the centre. We think it's very good value considering all that's included. 

WIN A FAMILY TICKET TO ANY 360 PLAY CENTRE

The gang at 360 Play have kindly offered one of my readers a family ticket (2 adults, 2 children) valid at any of their play centres. 

Please enter via the Gleam widget below. 

GOOD LUCK! 

Ends 11.59pm 10/10/19 

UK ENTRANTS ONLY 

360 Play Giveaway
SuperLucky Blog Giveaway Linky: the UK's biggest list of blog giveaways