Today I'm bringing you a super fun collaboration post.
Recently I've been working with the fabulous people at Cake Decor - who sell an amazing range of baking decoration supplies. You may have already come across their products on the shelves of major supermarkets like Waitrose, Sainsbury's, Asda, Tesco, Morrisons, The Range & Wilkos. Each of the fabulous products in the range is designed to require minimum effort but produce maximum effect.
Included in their current range is:
- Cake Lace
- Cake Pens
- Choco Writers
- Flavour-ice
- Glitter Spray
- Mirror Glaze
- Ready to Roll Icing
- Sprinkles
- Two Colour Stripes
- Writing Icing
The folks at Cake Decor sent me an awesome selection of their bestsellers and asked me to put them through their paces. So with the summer holidays ahead and teachers gifts to sort out for the end of July - over the past few months Bert and I have been getting our bake on, and enjoying experimenting with new to us products.
 |
| Amazing collection of Cake Decor goodies to keep us busy! |
The first product Bert was desperate to try was the two colour stripes cupcake frosting - this really appealed to me as I know how much work, time and how many ingredients go into making coloured/flavoured buttercream, especially when you have to spoon into piping bags - it can all get very messy and certainly isn't a very child-centred baking activity. These ready-to-squeeze tubes make two tone buttercream an absolute dream, and Bert really loved having a go at doing it himself.
We baked up a batch of our favourite super simple vanilla fairy cakes and once they were cool we got to work piping the striped frosting straight from the tube.
 |
| Bert with his fairy cake batter ready for baking |
 |
| our fairy cakes fresh from the oven |
 |
| Cake Decor Two Colour Stripes Cupcake Frosting: Strawberry & Vanilla |
Don't they look fabulous? Not only was the final result aesthetically really impressive, but the frosting was truly delicious too - it had such a nice texture and a real depth of flavour without seeming artificially over-sweet.
The only slight negative I found with this product is that at almost 4 years old, Bert found this a little tricky to squeeze out - you do need to be fairly strong and have good coordination to be able to pipe the frosting out successfully. He gave it a good go though, and was more than happy to watch me make them look pretty and scoff them as soon as I was done. Kids eh?
After creating strawberry and chocolate versions of our stripe cupcakes we moved on to decorating biscuits.
Here are three different ways you can use Cake Decor products to decorate biscuits.
Firstly, here's a truly child-centred activity which is a perfect way to entertain bored children...
Firstly, choose a pre-made/supermarket bought plain biscuit if choice - we chose Rich Tea, but a Digestive or any other plain biscuit with large surface area would work well.
Next, create a batch of simple runny icing by mixing icing sugar with either a little water, or lemon juice depending on preferences. You want the icing to be a spreadable consistency.
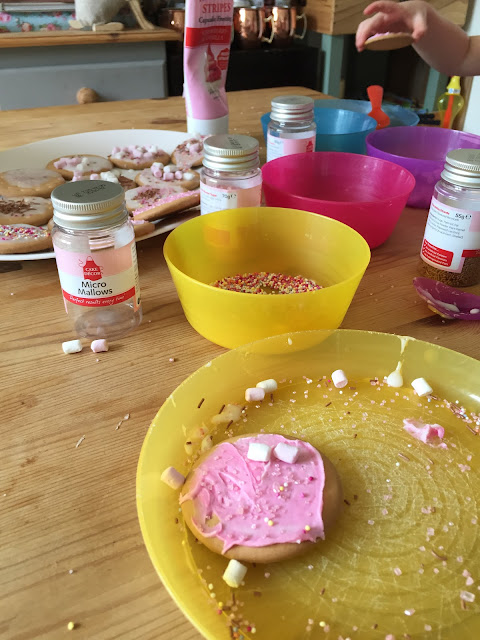
Finally, pop a selection of exciting Cake Decor decorations such as Hundreds and Thousands, sugar balls, micro marshmallows and glitter sugar into separate bowls easy for little hands to access.
I found it best to show Bert and his friend Lucy (who had come round to play) the decorating process first, before letting them loose on all the goodies. Spread your plain biscuit with icing, then sprinkle/arrange your Cake Decor goodies all over the icing until you're happy with your design.
Let the biscuits set slightly (if you can wait) before eating them.
Bert and Lucy had so much fun doing this, and it kept them amused for well over half an hour - not including the peace and quiet we got while they ate some too!
 |
| Biscuit decorating heaven with Cake Decor |
 |
| Biscuit decorating heaven with Cake Decor |
 |
| Bert's Cake Decor Biscuit |
 |
| Lucy's Cake Decor Biscuit |
 |
| Bert & Lucy's Cake Decor Biscuits |
Next, I was eager to get in some grown up baking time, so one afternoon while Connie slept and Bert was at school I decided to put Cake Decor's Cake Artist Pens to the test and get super creative decorating some handmade vanilla biscuits.
To make 12 biscuits you will need:
Ingredients:
175g plain flour
50 self raising flour
75g granulated sugar
75g salted butter, diced
75g golden syrup
1 egg, lightly beaten
To decorate (consumables):
250g white ready to roll fondant icing
1/2 tsp Tylo Powder
Cake Decor Cake Artist Pens
Food colour
Alchohol (I used vodka)
To decorare (tools/equipment):
Acyrlic rolling pin
Alphabet stamp set
Icing tool set (cutting wheel, stitch effect, round head)
Artists palette
Fine paintbrushes
Gel food colour set (I use Wilton)
Round cutters
Cake Decor Cake Artist Pens
Pipettes
Edible Glue
Firstly, I prepared my fondant icing using tylo powder to create modelling paste which works brilliantly for decorating biscuits in this manner. I bought my Tylo powder online from Amazon, it lasts absolutely ages as you only really use 1/2 tsp at a time. If you've never used Tylo powder before I suggest using this you tube tutorial, it's how I learnt and it worked perfectly for me. You won't use all of the 250g of modelling paste, but you wrap/store the icing in smaller pieces as part of this tutorial which will mean you can keep whatever's leftover for future baking sessions.
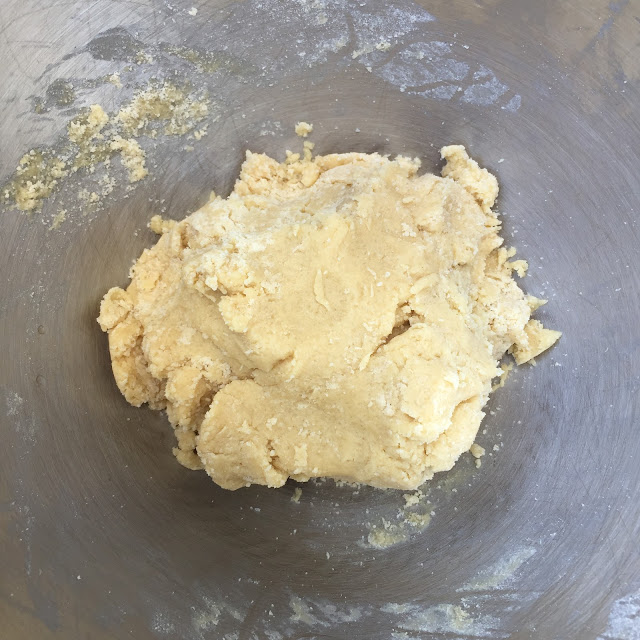
To bake the biscuits combine the flours and granulated sugar, rub in the diced butter then once light breadcrumbs have formed add the egg and golden syrup to form a dough. I usually roll the dough out between two sheets of baking paper - and then once about 1.5 - 2cm thick I pop the rolled dough into the fridge for half an hour (this firms up the dough making it easier to cut and transfer to a baking tray).
After half an hour, cut your biscuits into whichever shapes you prefer, the simpler the better for these biscuits, so I went for rounds. Transfer to a baking paper lined tray and bake in a preheated oven at 170℃ for 14-18 minutes until lightly golden.
Transfer to a wire rack after 5 minutes and leave to cool completely.
To decorate...
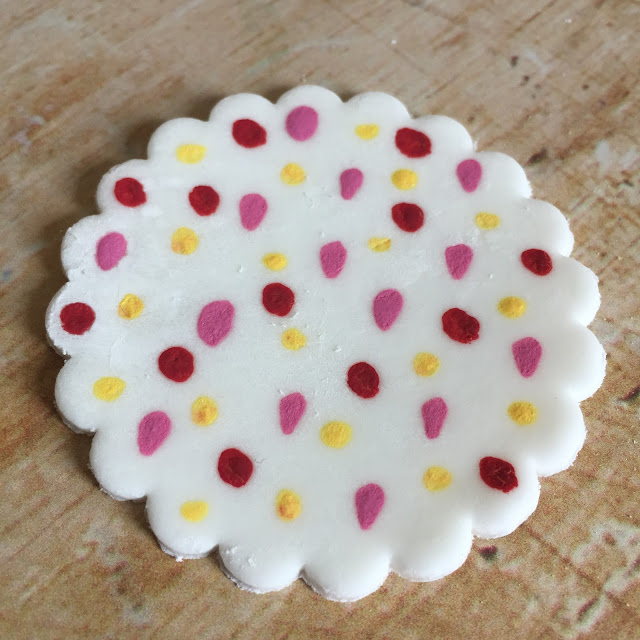
Roll out a piece of your modelling fondant to as thin as you prefer, mine was around 5mm. Use the same size or slightly smaller cutter to cut out round discs with or without fluted/frilled edges.
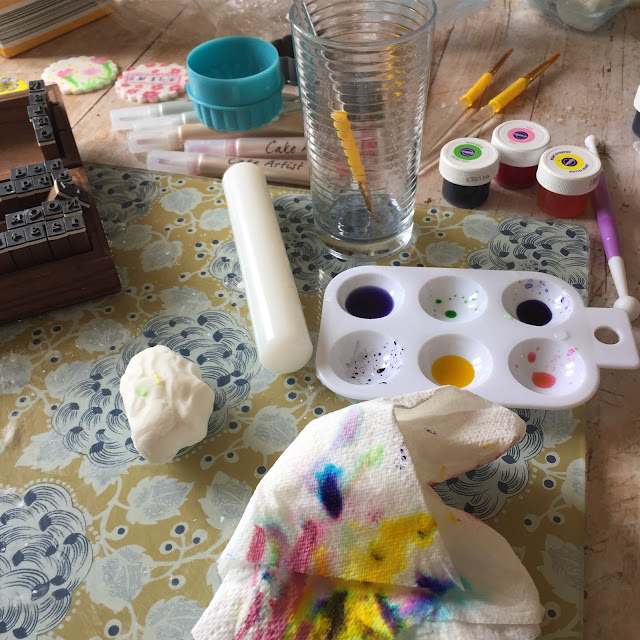
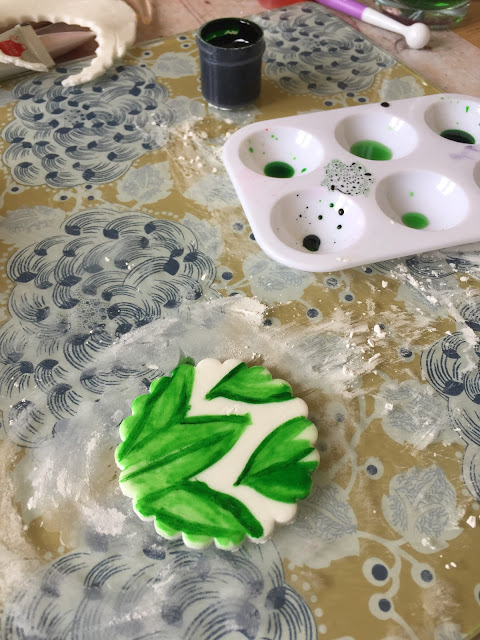
In your artists palette using a pipette (if these don't make you feel like a teenager in your Science classroom then I don't know what will!) I bought mine as a job lot on amazon and find them useful for all sorts of baking/craft/parent-y things (!) drop small amounts of vodka into each partition of your palette - then using a cocktail stick mix up some gel colour with the vodka - the more colour you put in the more vibrant the shade, water down with vodka - use them like you would water colour paints for the best effect.
I used a mixture of painting using these gel/vodka paints, stamping lightly into the icing using alphabet stamps, and stronger colour in the form of Cake Decor Cake Artist Pens.
I loved playing and just being able to let my artistic streak shine through - there was a lot of experimenting and some of the designs I liked more than others but all in all I was so pleased with the final results.
I found the Cake Artist pens so fun to use - they provide a very bold colour and are good for simple designs such as stripes, flowers and dots...I'm sure if I played with them for a bit longer I would get the hang of producing more refined artwork, but on this occasion I left that up to my edible watercolours...
The final stage is to attach your decorated icing discs to the biscuits - I just paint on a tiny bit of edible glue (found online or in Lakeland) and press down lightly - the disc will stick fairly quickly and the glue is absolutely edible and has no flavour at all.
 |
| work in progress... |
And so here are some of the final results... what do you think?
They were just so fun to make and I think they would make the most amazing gifts - I especially like the fact that you can make them so bespoke and personal depending on the designs and words you use.
Which was your favourite one? Mine was the flamingo and cactus!
The final piece of Cake Decor kit I wanted to put through its paces were the edible cake pens - these TOTALLY blew my mind and are by far my favourite decoration effect so far from the Cake Decor collection.
Not only are these AMAZING for children to use, but they also work brilliantly for adults looking to create a no fuss decoration.
Our aim for this baking session was to create end of year teacher gifts for Bert's (8!) Pre-School teachers. I used the same biscuit recipe as above (and just doubled it) and luckily I still had plenty of modelling fondant left over to use.
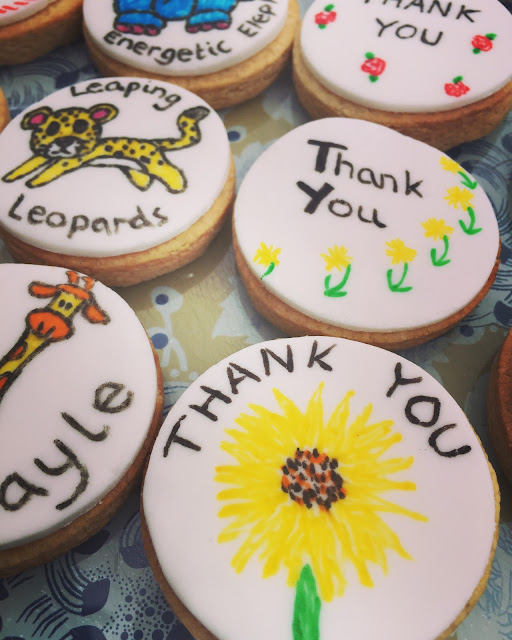
We made each teacher three biscuits - one with a simple 'Thank You' design, one with the name of their animal work group and a doodle of said animal (E.g. Terrific Tigers, Energetic Elephants etc.) and one with their first name initial. I did a black dotted line of their initial on the fondant, which Bert then traced over (all with the edible pens), much like he does when he's working on his letters at school.
We used the edible cake pens for all of the decoration and I think the effect is brilliant. Bert managed to use them really well - they work in exactly the same way as a felt tip - so they're totally uncomplicated. I loved the 'colouring in book' look to the designs we created - I think it was especially cute because of the recipients of the biscuits in question.
Thankfully Bert's teachers were very touched by the effort we'd gone to to thank them.
Bert was SO EXCITED to give them out on his last day of Pre-School; seeing his happy little face made all the work totally worth it.
 |
| A little 'Thank You' using Cake Decor Edible Cake Pens- icing discs ready to be attached to biscuits. |
 |
| Which is your favourite? |
 |
| Bert's writing!! *ADORABLE* |
A big 'Thank You' in biscuit-form.
 |
| Teacher biscuits all bagged up and ready to give out. (Bags found for £5 in HomeSense) |
I have lots more bakes in mind to work my way through the rest of my Cake Decor goodies - including a show stopper 4th Birthday cake for Bert in a few weeks time, so watch this space for a cake post to follow soon.
GIVEAWAY TIME!
In the meantime, if you'd like to get your hands on a fabulous set of Cake Decor goodies so you too can get creative in the kitchen then please enter my giveaway below via the Gleam app.
Good luck & happy baking lovely people...
Mrs B
xxx


